Showing posts with label gifts. Show all posts

Sunday, July 27, 2014

What I've Been Up To

It's hard to believe that I haven't posted anything here in six months. Would you believe that I haven't even sewn anything in almost six months?!? It makes me a little sad when I think about that, but I'm getting ready to start sewing again! I have two good reasons: a new baby coming in the next month (my sister's) and my need for a new bag (always a good reason to sew ;).

I'm planning on my usual family baby gift for my sister: a baby quilt, one of my embroidery hoop birth announcements, and my tumbler stripe blanket.

My go-to baby gift for my family members.

I need to get started, but I'm thinking I'm going to have to wait another month until the new school year begins. I'm ready to get going as soon as time allows... I already have the fabric for the quilt. My sister is a big fan of purple and blue, so I decided on Tula Pink's Fox Field in Dusk:

image via Hawthorne Threads

I haven't decided on a pattern yet, but I'm partial to patchwork, so I have a feeling that may be the direction I'm heading.

As for a bag for me, I wasn't interested in making one for myself (even though I've been looking and looking for a bag to buy and haven't been able to find just the right one) until I saw the Sidekick Tote that AnneMarie of Gen X Quilters made, then I got a little giddy about the idea of sewing a new bag. I even picked up some gray mochi dot linen just in case the mood strikes and I feel like getting started. I think I'm even going to pull out some of the fabric I've been hoarding and use it on this bag.

In other news, I've recently been contacted by two home-based sewists who are interested in selling my pencil-shaped pouches at craft fairs, in their Etsy shops, etc. I have decided that I will be selling a Limited Commercial License to people who are interested in using my pencil pouch tutorial to make pouches to sell for profit. I will be posting the details and a link to the terms and information tomorrow morning.

Thanks to everyone who is still out there reading my posts. I know they are infrequent, but I still love this blogging community and miss the interaction and my friends.


Wednesday, January 29, 2014

Hello 2014

I've been neglecting this little space of mine, but I'm OK with that for now. I've been trying to sit back and enjoy the ride for a bit. But I do share what I'm up to on Instagram from time to time (I'm @gwennypenny2), so I'd love to see you over there.

I have been sewing. I made a whole slew of tissue holders for Christmas...


Updated: I totally forgot to mention the tutorial I used for these tissue holders! It's from The Cottage Mama, and you can find it here.

Another one of my birth announcement embroidery hoops for my new nephew...


And an applique penguin t-shirt for my youngest's 4th birthday...


This was done using the Silhouette Portrait that I got for Christmas. I love that machine so much. I always wondered if I would actually use one if I had it, so I never really thought about getting one, but I have given that thing quite a workout in the month that I've owned it. If you're on the fence, get one!

See you around :)


Tuesday, August 13, 2013

Another Pint-Size 241 Tote

Back in February I shared the smaller version of the Noodlehead 241 tote that I made for my youngest. When my oldest's 6th birthday rolled around in June, she asked me to make one for her, too. Just like last time, I let my daughter choose the fabrics, with a little guidance :) It turned out really cute.


The fabric is from the Happy Jungle collection by Allison Cole for Camelot Cottons.
  • Jungle Animals in Turquoise
  • Happy Sky in White
  • Diamond Ikat in White/Aqua

I stuck with shrinking the pattern to 75% and then sized the strap to fit my daughter. And I once again skipped the magnetic snap closure and interior pockets. Keep it simple.


I also sewed up a Michelle Patterns dumpling pouch to match.


This is my fourth 241 tote and my sixth dumpling pouch... am I stuck in a rut or what?!? It doesn't bother me... These patterns have served me well, and I'm sure I am nowhere near done with them :)


Monday, February 18, 2013

Pint-Size 241 Tote

My youngest turned three a few weeks ago, and she requested a couple of handmade items for her birthday. Last week I shared the bubble dress that I made for her. Today I'm going to share the other gift she asked for... a bag "like mom's." I started thinking about which bag would work best for her to carry her "treasures" − a stuffed bear, a set of plastic keys, and an old cell phone − around in. I decided to go with Anna's 241 tote pattern. I've made two of these in the past (which you can find here and here), and it's just a fun bag to make. I started thinking about how much I wanted to shrink the pattern. I almost went with 50%, but then I figured that someone must have tried this already, and I was right! A quick internet search brought me to LRstitched, where Lindsey had sewn a mini 241 bag for her daughter about a year ago. She had shrunk the pattern to 75%, so I decided to go the same route. It's the perfect size for a three year old...


Love it! My daughter picked out the fabrics herself (Well, by "herself" I mean that she picked out the ladybugs and polka dots, then I gently guided her to the pink solid. Otherwise, we would have had some purple panda bears in there :)


Fabric:
  • Spring Ladybugs from Urban Zoologie by Ann Kelle
  • Scattered Dots in Summer from Remix by Ann Kelle
  • Kona Cotton in Bright Pink


I will say that it gets a little tight sewing the topstitching around the side panels when you shrink the pattern to 75%. I had to pick the stitches out twice, then I almost said to heck with the topstitching before I gave it one last try. It's difficult, but it can be done.


And no bag would be complete without a matching zipper pouch...


And she was very happy to find three dollar bills and a little mirror compact inside :)


Next post, time to share that tooth fairy pillow I mentioned way back in December...


Monday, November 26, 2012

Holiday Bake, Craft & Sew Along: Linen Stocking Ornament

Today you'll find me guest posting over at Skip to my Lou as part of the fantastic annual Holiday Bake, Craft and Sew Along.


Head on over to Skip to my Lou to check out my cute little linen stocking ornament tutorial.


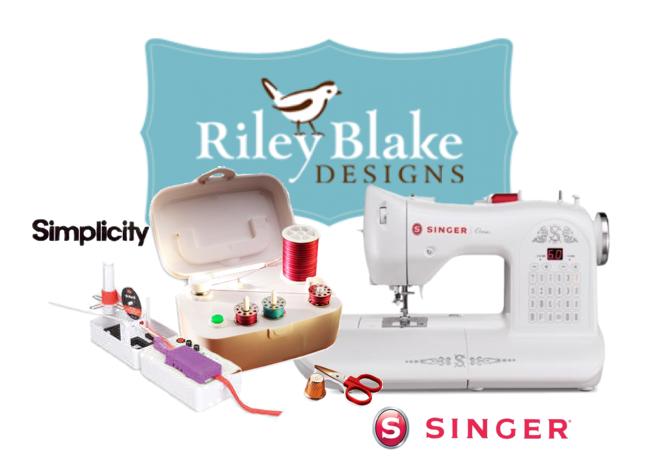
And... I get to treat you to a SEW Amazing giveaway as part of our crafty series. This is one AMAZING giveaway! We are giving away a fabulous Prize Package worth more than $700!
One lucky winner will receive...
  • Singer ONE Sewing Machine  This is Singer's easiest sewing machine! True to SINGER, it is easy to learn on, simple and has basic stitches for crafts. The perfect machine for stitching home made goods or something fun this holiday season!
  • Simplicity SideWinder  Quickly and easily fill bobbins without having to un-thread and re-thread your sewing machine. The SideWinder transfers thread from spool to bobbin effortlessly and quickly; works with most bobbins, metal or plastic. An adjustable tension knob accommodates different thicknesses of thread! So cool!
  • Simplicity Bias Tape Maker  This Simplicity Bias Tape Maker will create customized single fold bias tape with the push of a button!
  • And so you have something beautiful to sew, $100.00 of fabric from Riley Blake!
Simply wait for RaffleCopter to load below and enter there! Be sure to check out all of the fabulous sewing projects shared during the Holiday Bake, Craft and Sew Along series going on all month long at Skip to my Lou!

a Rafflecopter giveaway

Friday, June 8, 2012

Another Tumbler Stripe Baby Blanket

A couple months ago I made one of my tumbler stripe blankets as an early baby gift for a very good friend of mine. It was so interesting to follow one of my own tutorials. I don't go back and repeat my own projects very often, so it was kind of fun :)


I used my GO! Baby to crank out the tumbler shapes... makes things so much easier.


This time I went with a darker gray for the front and a raspberry pink minky for the back...


And I added a little tag on one side...


I think my friend was happy with it, and I hope her little girl loves it when she arrives this summer.


Friday, May 4, 2012

Point of View Feature and Theme for May

Thanks to everyone who linked up their Teacher Appreciation/End of School projects at the Point of View Link Party last Friday. There were some really cute ideas linked up, so if you're still looking for an end of year teacher gift, take a minute to pop over and check them out.


This month I am featuring this beverage dispenser teacher appreciation gift idea from Heather over at Our Life in a Click...


Heather took a cute plastic beverage dispenser and added a variety of lemonade and tea mixes. What a great way for a teacher to enjoy their gift all summer long!


This is such a simple and clever idea, and I'm definitely going to be using this in the future.

The Point of View theme for May is Summer/Vacation. I can't believe summer is right around the corner! Yippee! The next reveal and link party will be Friday, May 25th. Hope to see you there! We can't wait to see what you come up with :)


Thursday, May 3, 2012

Dumpling Pouches

I wanted to make a little handmade gift for each of my SNAP roommates, and the Michelle Patterns dumpling pouch tutorial fit the bill perfectly...


(By the way... did you know that Keyka Lou Patterns recently changed to Michelle Patterns? Just found that out while writing this post). This is a free tutorial that includes patterns for two different size pouches. I went with the easier (larger) pouch. It was pretty simple to put together, and by the third one I felt like I had gotten into a rhythm. I shouldn't have stopped at three because now I'd really like one for myself.


These go together fairly quickly and really make a great little gift for someone.


I highly recommend this tutorial. I've never tried one of Michelle's patterns, but if they are as well written as this tutorial, I'm sold. I'm eyeing her Ditty Bag pattern and her Padded Camera Pouch pattern.


Friday, April 27, 2012

Point of View and End of School Link Party!

Welcome to this month's Point of View reveal! The theme for April is "Teacher Appreciation/End of School". This month's theme was just the motivation I needed to get my daughter's preschool teacher gifts done early... woohoo! Take a look at the great ideas the members of Point of View have come up with this month...


Gwen from Gwenny Penny (Click HERE to read more about my Covered Button Magnets)
Leanne from Organize and Decorate Everything
Amy from Ameroonie Designs
Jonie from Just Between Friends
Ashlee from I'm Topsy Turvy

As always, you can check out each of the projects by visiting each of the blogs listed above.

In case you missed my SNAP conference recap post this week, guess what?!? All five members of Point of View were at the conference! It was so great to spend a little time getting to know these ladies better.

Back (L to R): Ashlee, Leanne, Jonie, Gwen; Front: Amy

OK, let's get to it... My project this month is cute, quick, and simple. Both of my girls were able to help with this project. Check out these fabric covered button magnet sets...


Aren't they adorable? And they are so easy to put together. My four year old had the best time picking out fabric to use for each of these magnet sets. She can't wait to give them to her preschool teachers at the end of the school year. Click HERE to read the details of my project.

Now it's your turn. Do you have a Teacher Appreciation/End of School project that you would like to share? We would like to invite you to join the Point of View Link Party! It doesn't have to be a new project... If you have a Teacher Appreciation or End of School project in your archives, link it up! We want to see what you've created. You can link up to the Point of View link party on any member's blog and your link will show up in the party on all five blogs! Add the Point of View button to your post so that others can join the party. And remember, by linking up you have the chance to be featured by one of the members of Point of View next week!

Gwenny Penny - Point of View
<div align="center"><a href="http://www.gwennypenny.com" title="Gwenny Penny - Point of View"><img src="http://i953.photobucket.com/albums/ae14/gwennypennyblog/SummerPoVButtonB-1.jpg" alt="Gwenny Penny - Point of View" style="border:none;" /></a></div>

Covered Button Magnets (A Mini Tutorial)

Today I'm sharing a really cute, quick, and simple gift idea.


This month's Point of View theme is "Teacher Appreciation/End of School". We have eight (yes, I said eight) people to give to at my daughter's preschool. It can get pretty expensive when it comes to holiday and end of school year gifts for eight teachers, so I wanted to come up with something inexpensive that my daughter could help me make. I decided to go with fabric covered button magnet sets for each teacher. These are so easy; anyone can make them. Seriously, no excuses... my two year old was helping us. I'm not going to go into a full tutorial on these because they are pretty self-explanatory and the directions for covering the buttons come right on the package of the cover button kit. But I will tell you what you need and what sizes I used.

Materials:
  • 7/8" (size 36) cover button kit (I used this one)
  • fabric scraps with images no larger than 7/8"
  • 0.625" round magnets
  • glue (I used E6000)
  • scissors
  • cardstock (optional)
Instructions:

My cover button kit came with a round plastic template to trace onto my fabric for each magnet, but some kits have a circle template that you cut out from the cardboard backing of the package. Look over your fabric and choose which images you want to display on your magnets. Center your template over each image, trace around the template, and cut each traced circle from your fabric.

Now it's time to cover your buttons. The directions will be on the back of your cover button kit, or you can check out the very first tutorial I ever wrote on this blog for more details on covering buttons... scroll about halfway down that post to the title Part II: Making and Adding the Fabric Covered Button.

After your buttons are covered, glue a magnet onto the back of each button. Test your magnets first. Some magnets only stick on one side, so make sure that the "sticky" side that sticks to your fridge is not the side you glue to the back of your button.


I wanted a cute way to display the buttons, so I used my Sizzix Big Kick die cutter to cut out some extra large tag shapes from cardstock. My daughter signed her name on the back of each tag, then I used a little piece of double sided tape to stick the magnets to the front of the tags. Easy-peasy and ready for gifting!


These are not only a great teacher appreciation gift, but they are also a great little gift to keep on hand for unexpected (or forgotten :) occasions. And I think it was nice that my daughter was able to help out with this one, too.

Now it's your turn... Check out this month's Point of View collage and link up your past or present Teacher Appreciation/End of School projects at the Point of View Link Party! We want to see what you've been up to!


I'm linking up...

monogram
kojodesigns
Related Posts with Thumbnails