Showing posts with label tutorials. Show all posts

Friday, December 7, 2012

Point of View and Ornament Link Party

Welcome to this month's Point of View reveal! The theme this month is "Ornaments". Here are the ideas the members of Point of View came up with this month...

POV-Decemberr-2012

Gwen from Gwenny Penny (Click HERE for the tutorial for my Popsicle Stick Sled Ornament)
Leanne from Organize and Decorate Everything
Ashlee from I'm Topsy Turvy

As always, you can check out each of the projects by visiting each of the blogs listed above.

My project this month is this cute little Popsicle stick sled ornament...


I love this ornament! It's based on an ornament that my in-laws used to hang on their tree. I've always wanted to recreate it, and I don't know why I waited so long... it's so simple to put together. Click HERE for my Popsicle Stick Sled Ornament tutorial.

I want to let everyone know that I've decided that this will be my last month of Point of View. I've been a part of this group since it began back in March of 2011, and it has been such an honor to team up with these ladies every month. Thank you Amy, Jonie, Leanne, and Ashlee for everything.

Now it's your turn. Do you have an ornament that you would like to share? We would like to invite you to join the Point of View "Ornament" Link Party! It doesn't have to be a new project... If you have a project in your archives, link it up! We want to see what you've created. You can link up to the Point of View link party on any member's blog and your link will show up in the party on all five blogs! Add the Point of View button to your post so that others can join the party. And remember, by linking up you have the chance to be featured by one of the members of Point of View next week!

Gwenny Penny - Point of View
<div align="center"><a href="http://www.gwennypenny.com" title="Gwenny Penny - Point of View"><img src="http://i953.photobucket.com/albums/ae14/gwennypennyblog/SummerPoVButtonB-1.jpg" alt="Gwenny Penny - Point of View" style="border:none;" /></a></div>


Popsicle Stick Sled Ornament Tutorial

After my husband and I got married, my mother-in-law gave us a whole bunch of old Christmas ornaments. Included in the bunch was a little red sled made out of Popsicle sticks. I was more than a little excited that she gave it to us because I'd been eyeing it for several years :) I've always wanted to recreate it, and 
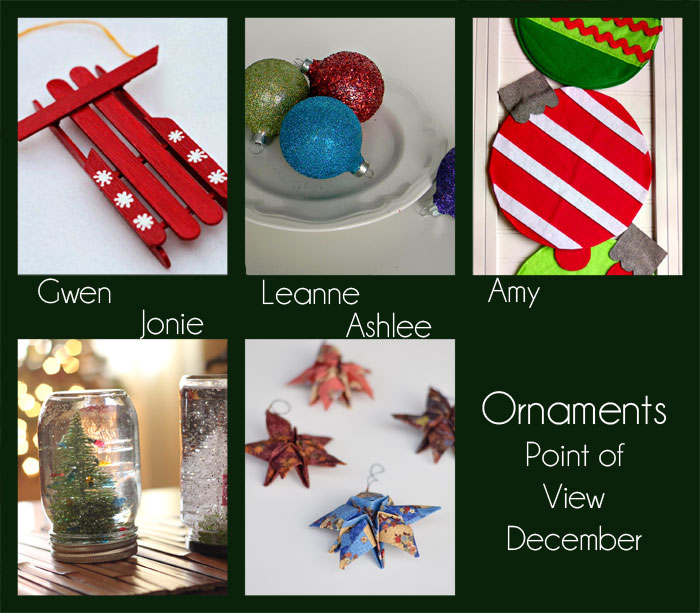
this month's Point of View theme "Ornaments" gave me a good excuse to give it a try.


I'm so happy with how this turned out. And since I'm feeling a little sad about not hosting my annual "Haul Out the Holly" holiday series this year, I thought I'd put together a tutorial for this ornament. Hope you like it :)

Materials:
  • six 4.5" Popsicle sticks (Although I should probably be saying "craft sticks" since Popsicle in trademarked.)
  • three 2.5" matchsticks (toothpicks would also work)
  • XACTO knife
  • ruler
  • glue gun
  • acrylic craft paint
  • Mod Podge
  • small paint brushes
  • 8" of embroidery floss (for hanging)
  • sandpaper (optional)
Instructions:

Step 1: Take one craft stick and cut it in half at a 45 degree angle. To do this, measure and mark the middle of your craft stick (2.25"). Mark a 45 degree angle through the center mark (I eyeballed it).


Lay your ruler along the angle mark and use it as a guide to cut through your craft stick. Take your time!


You should end up with two equal pieces with angled ends. If you'd like, gently sand the cut ends. Set these two pieces aside.


Step 2: Take another craft stick and cut it to 3.5" long with the ends cut at 45 degree angles (see photos below).


If you'd like, gently sand the cut ends. Set this piece aside.

Step 3: Cut all three matchsticks (or toothpicks) to 1.75" long each. Set aside.

Step 4: Take two whole craft sticks and the two angled pieces from Step 1. Set them up like so...


The entire width should be somewhere between 1.75" and 2". Evenly space the four pieces. The angled side pieces should be placed about 1/4" up from the bottom of the two center craft sticks.

Get out your glue gun and two of the matchsticks from Step 3. Glue one of the matchsticks to all four craft sticks near the bottom of the sled. Glue the other matchstick to all four craft sticks near the middle of the sled...


Step 5: Take your 3.5" piece from Step 2. Center it underneath the two center craft sticks, about 1/2" down from the top. Glue in place.


Step 6: Take your third matchstick from Step 3. Glue it to the two center craft sticks across the top of the sled, centering it horizontally.


Step 7: Last construction step! Time to add the sled runners. Take one of your remaining whole craft sticks and glue it standing on edge on top of all three of the matchsticks on the far left side of the sled.


Repeat with your last remaining whole craft stick on the far right side of the sled.


Step 8: Time to paint! Paint the entire sled (glue and all) with acrylic craft paint. Let dry. Embellish as desired. You could decorate it with washi tape, ribbon, stickers. I just painted on some little white snowflakes. Let dry. Mod Podge the entire ornament to seal it. Let dry.


Step 9: Take your 8" piece of embroidery floss. Glue it to the back of your sled at both ends of the 3.5" piece from Step 2.


And now you have a super cute sled ornament for your tree!


The XACTO knife and glue gun don't exactly make the construction part of this project kid friendly, but I made a couple extra and gave them to my girls to paint, which they loved. If you're looking for a fun Scout project or something to do with a small group of kids, you could easily put these together ahead of time and have them paint and decorate the sleds.


Hope you enjoyed this tutorial. If you try it out, please add pics to the Gwenny Penny Flickr Group... I'd love to see how they turn out! Happy Holidays!

Monday, November 26, 2012

Holiday Bake, Craft & Sew Along: Linen Stocking Ornament

Today you'll find me guest posting over at Skip to my Lou as part of the fantastic annual Holiday Bake, Craft and Sew Along.


Head on over to Skip to my Lou to check out my cute little linen stocking ornament tutorial.


And... I get to treat you to a SEW Amazing giveaway as part of our crafty series. This is one AMAZING giveaway! We are giving away a fabulous Prize Package worth more than $700!
One lucky winner will receive...
  • Singer ONE Sewing Machine  This is Singer's easiest sewing machine! True to SINGER, it is easy to learn on, simple and has basic stitches for crafts. The perfect machine for stitching home made goods or something fun this holiday season!
  • Simplicity SideWinder  Quickly and easily fill bobbins without having to un-thread and re-thread your sewing machine. The SideWinder transfers thread from spool to bobbin effortlessly and quickly; works with most bobbins, metal or plastic. An adjustable tension knob accommodates different thicknesses of thread! So cool!
  • Simplicity Bias Tape Maker  This Simplicity Bias Tape Maker will create customized single fold bias tape with the push of a button!
  • And so you have something beautiful to sew, $100.00 of fabric from Riley Blake!
Simply wait for RaffleCopter to load below and enter there! Be sure to check out all of the fabulous sewing projects shared during the Holiday Bake, Craft and Sew Along series going on all month long at Skip to my Lou!

a Rafflecopter giveaway

Friday, April 27, 2012

Covered Button Magnets (A Mini Tutorial)

Today I'm sharing a really cute, quick, and simple gift idea.


This month's Point of View theme is "Teacher Appreciation/End of School". We have eight (yes, I said eight) people to give to at my daughter's preschool. It can get pretty expensive when it comes to holiday and end of school year gifts for eight teachers, so I wanted to come up with something inexpensive that my daughter could help me make. I decided to go with fabric covered button magnet sets for each teacher. These are so easy; anyone can make them. Seriously, no excuses... my two year old was helping us. I'm not going to go into a full tutorial on these because they are pretty self-explanatory and the directions for covering the buttons come right on the package of the cover button kit. But I will tell you what you need and what sizes I used.

Materials:
  • 7/8" (size 36) cover button kit (I used this one)
  • fabric scraps with images no larger than 7/8"
  • 0.625" round magnets
  • glue (I used E6000)
  • scissors
  • cardstock (optional)
Instructions:

My cover button kit came with a round plastic template to trace onto my fabric for each magnet, but some kits have a circle template that you cut out from the cardboard backing of the package. Look over your fabric and choose which images you want to display on your magnets. Center your template over each image, trace around the template, and cut each traced circle from your fabric.

Now it's time to cover your buttons. The directions will be on the back of your cover button kit, or you can check out the very first tutorial I ever wrote on this blog for more details on covering buttons... scroll about halfway down that post to the title Part II: Making and Adding the Fabric Covered Button.

After your buttons are covered, glue a magnet onto the back of each button. Test your magnets first. Some magnets only stick on one side, so make sure that the "sticky" side that sticks to your fridge is not the side you glue to the back of your button.


I wanted a cute way to display the buttons, so I used my Sizzix Big Kick die cutter to cut out some extra large tag shapes from cardstock. My daughter signed her name on the back of each tag, then I used a little piece of double sided tape to stick the magnets to the front of the tags. Easy-peasy and ready for gifting!


These are not only a great teacher appreciation gift, but they are also a great little gift to keep on hand for unexpected (or forgotten :) occasions. And I think it was nice that my daughter was able to help out with this one, too.

Now it's your turn... Check out this month's Point of View collage and link up your past or present Teacher Appreciation/End of School projects at the Point of View Link Party! We want to see what you've been up to!


I'm linking up...

monogram
kojodesigns

Monday, April 2, 2012

Easter Bunny Embroidery Hoop Tutorial

Easter is only a week away, and I'm on an applique kick! Today I'm sharing a tutorial for a cute, simple, and quick Easter bunny embroidery hoop...


This project uses fabric scraps and can be put together so quickly that you definitely can find time to get this done before this weekend.


This hoop was inspired by some cookies I found on Etsy. You never know where inspiration will come from :) Ready to put one together? Here's the how-to...

Materials:


  • background fabric (approximately 11" square)
  • scraps for bunny (I used gray and pink.)
  • fusible web (I used Heat n Bond Lite.)
  • 7" embroidery hoop
  • fabric paint or embroidery floss for eyes
  • iron
  • glue gun
  • thread
Instructions:

Step 1: Print out this template at 100% (no scaling, do not "fit to page")...


Step 2: Following the manufacturer's directions, apply fusible web to the back of all of your fabric scraps that you are going to use for the bunny pieces.

Using the template from Step 1, cut out the ears*, inner ears*, head, and nose from your fusible web backed fabric scraps. *Important: add about ¼" to the bottom of each ear and inner ear. This is so you can overlap the bottom edge of the ears with the head piece.

Step 3: Place your background fabric right side up. Lay your embroidery hoop in the center of your background fabric. Remove the fusible web paper from the back of each of your bunny pieces and arrange the pieces inside the embroidery hoop.


Once you have them arranged to your liking, start pressing each piece in place, following the manufacturer's directions. Start with the ears, then the inner ears.


Next, overlap the head over the bottom edge of the ears. I placed my embroidery hoop back on top to see exactly where I wanted to press the head in place.


Then press the nose in place.


Step 4: Time to sew around the edges of each piece. I used Maureen's technique for my applique  a straight stitch, using black thread, that leaves the edges raw  but you could use a zigzag or satin stitch with coordinating thread, depending on what look you prefer.


Step 5: Time to add your bunny's eyes. Again, this one is up to your personal preference. You can embroider the eyes, or I painted mine on with fabric paint (because my embroidered circles never quite turn out to be circles).


Step 6: Almost done. Stretch your completed bunny square inside of your embroidery hoop. Make sure to align the bottom of the bunny's head with the bottom curve of the hoop. Trim the excess fabric to 3/4" from the edges of the back of the embroidery hoop. Use your glue gun to glue the edges of the fabric to the inside of the back of the hoop. Cover the back with felt if desired.


And you're done!


So glad I was able to squeeze this project in before Easter. If you find time to make one, add a picture to the Gwenny Penny Flickr group. I'd love to see it!


I'm linking up:
Skip To My Lou
Related Posts with Thumbnails